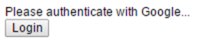
Login
a. Follow provided link
It is recommended to use Google Chrome browser for the best experience
b. Click Login button
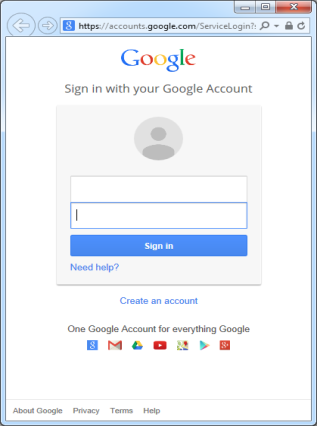
c. If asked - Sign in with your Google account
d. While working with Tool, you can be asked for re-authentication
Just click Login button in pop-up and you are done
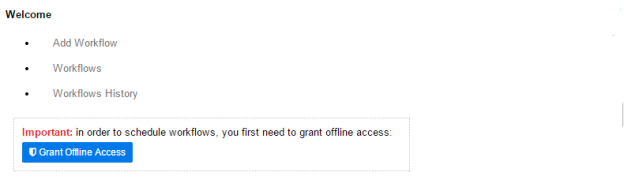
or don't forget to Grant Offline Access (next step)
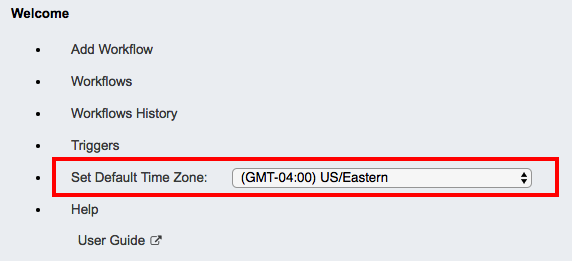
Set Default Time Zone
a. The date and time in Magnus UI are displayed in server time zone.
To display the date and time in a different time zone, select the time zone in the dropdown list. You selection is saved locally in your browser’s cookie. So if you clear your cookies or use a different device, you will have to select your time zone again. This time zone only affects how the date and time are displayed in Magnus UI. This does not affect Workflow time zone. To specify time zone of your Workflows, you need to update the time zone of your Workflow in Workflow Editor.
Grant Offline Access
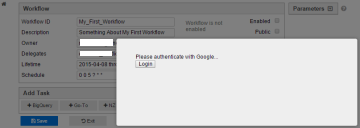
a. After authentication is completed you will be presented with below screen
Click Grant Offline Access button
Note: you need to grant offline access only one time when you start working with tool
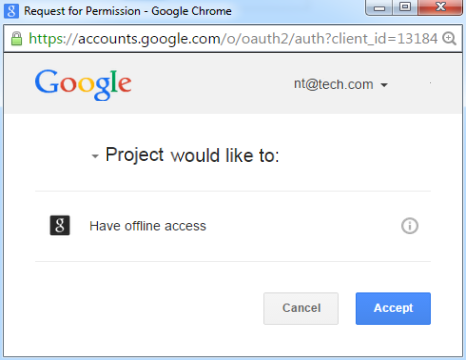
b. Click Accept button in pop-up window
c. Copy code in yet another pop-up window
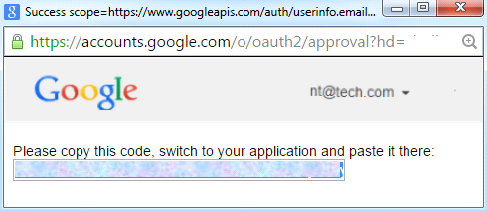
d. Switch back to Tool and paste code in textbox that appeared in place of Grant Offline Access button
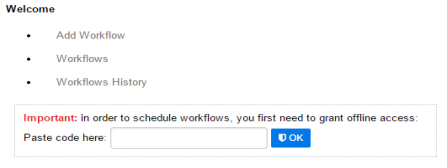
e. Click OK button and you ready to go with below screen
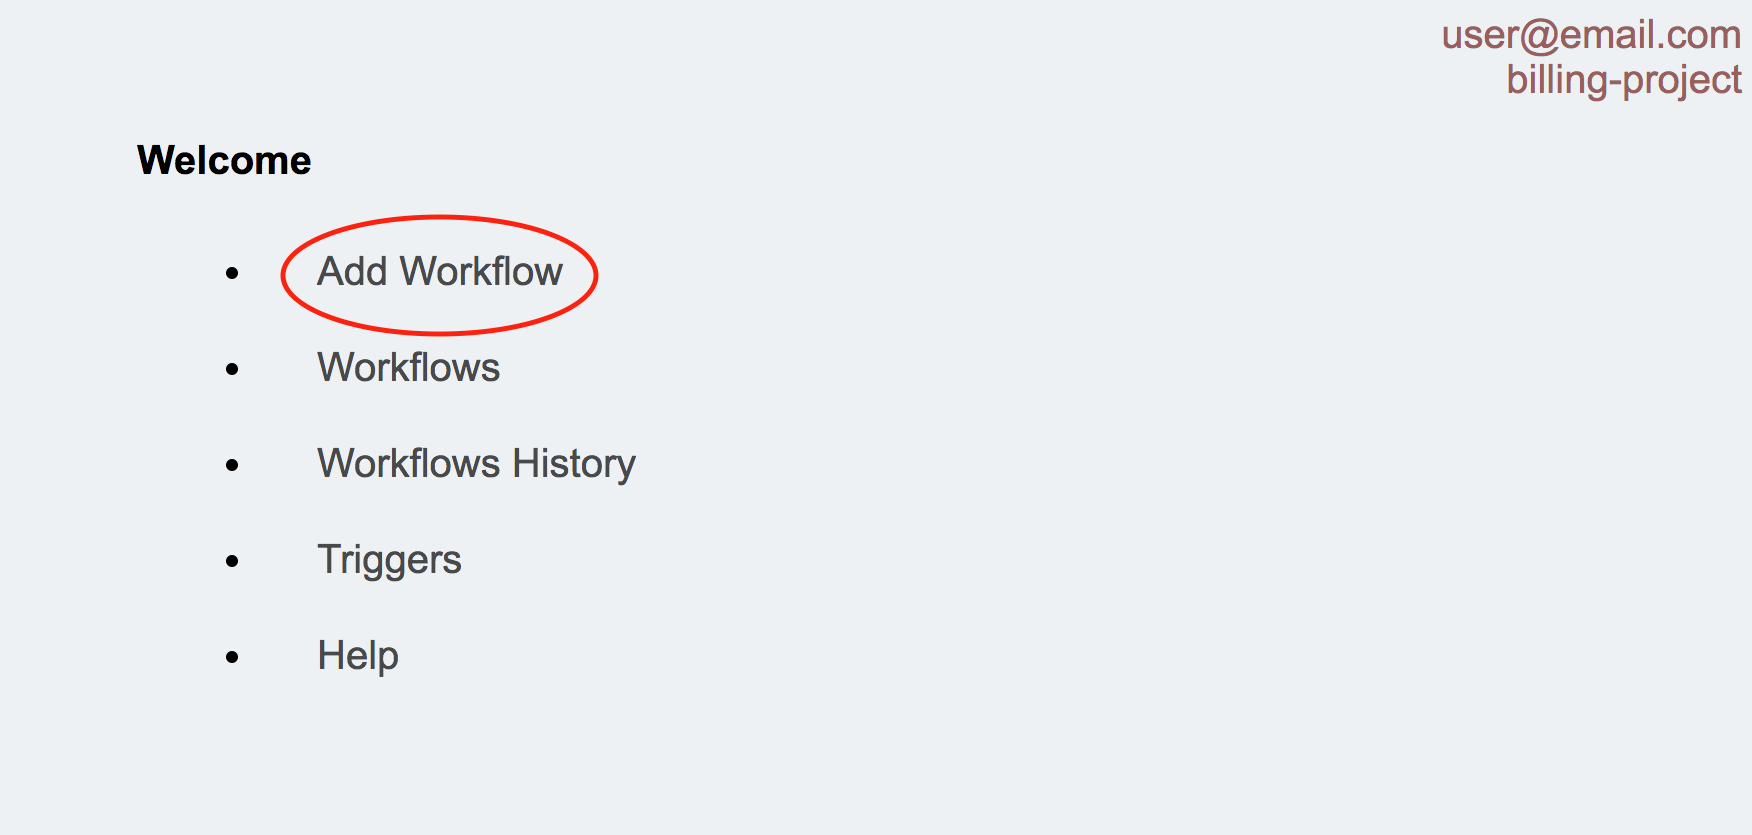
Add New Workflow
a. Click Add Workflow Menu Item
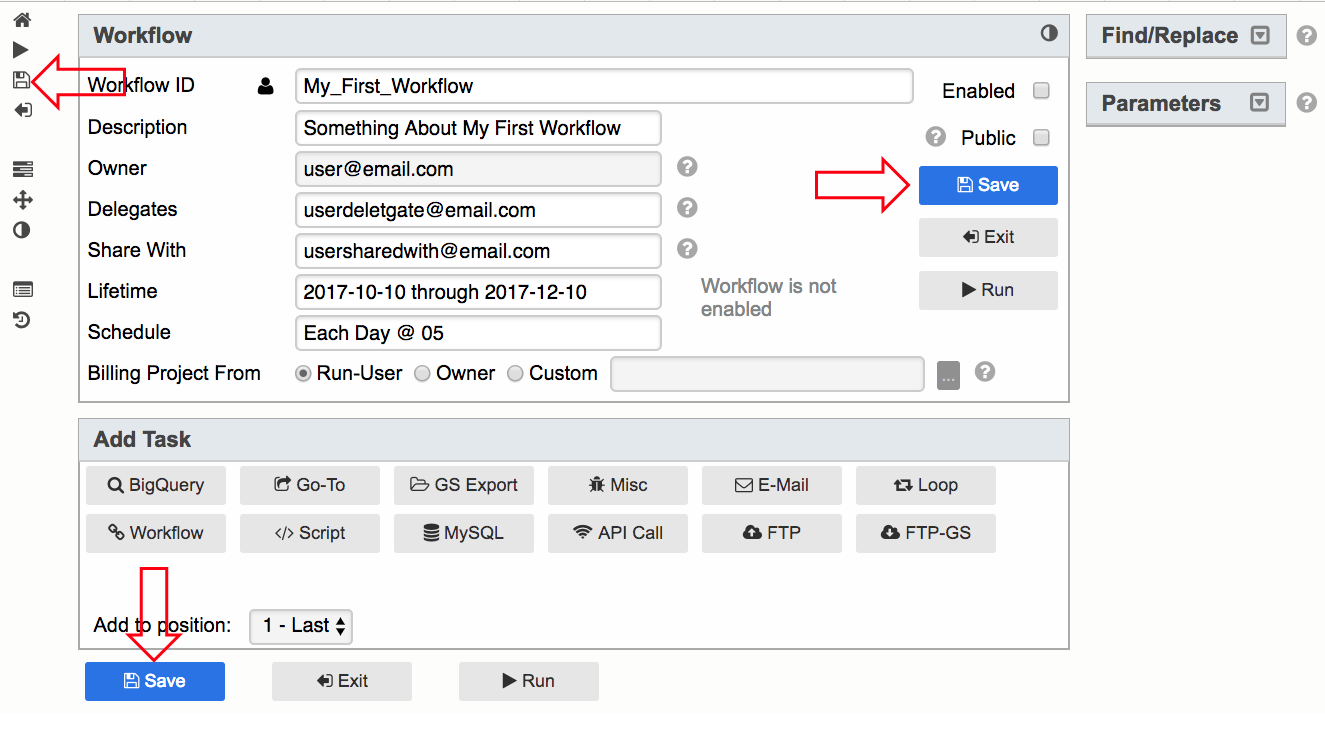
b. Enter all input fields in Workflow Panel
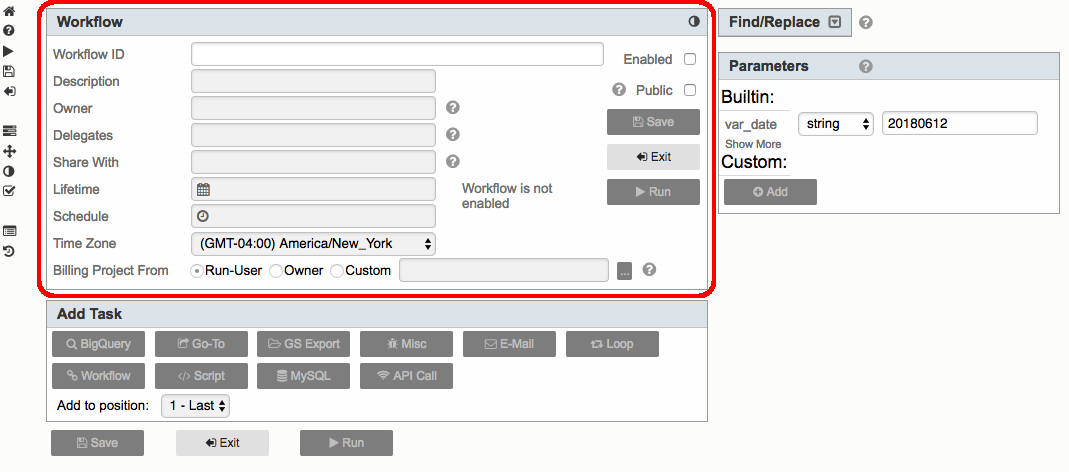
Input Fields:
| Workflow ID | Unique (across all Workflows present in Tool) workflow identifier. Case-sensitive |
| Description | Free text describing Workflow |
| Owner | User created workflow. Can be changed only by Admins if requested. When workflow run via Scheduler - it is run under Owner's account and billed to respective billing project |
| Delegates | Comma-separated list of users who are granted (by owner or other delegates) edit access and all execution rights to given Workflow. With very few exceptions - delegates can do all the same as owner. Delegates can see respective workflow in Workflow History and execution details |
| Share With | Comma-separated list of users who are granted (by owner or other delegates) view access and restricted execution right to given workflow. Users from "Share With" list can run the Workflow via Execute Workflow Task only. |
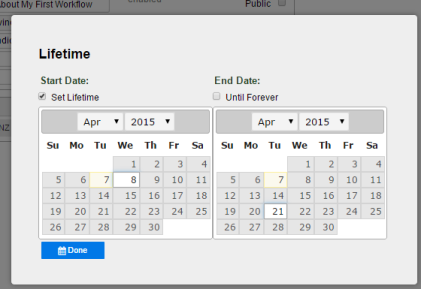
| Lifetime |
Define Start and End Dates for schedule Set Lifetime should be checked
|
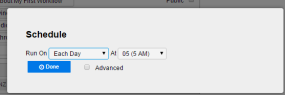
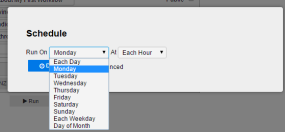
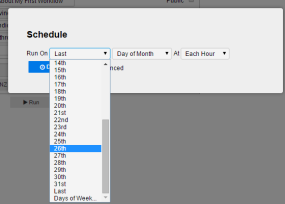
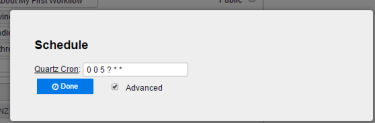
| Schedule |
Define Schedule. |
| Time Zone |
By default, the Workflow is executed in Magnus’ server time zone, which is US/Eastern. You can change the time zone in which to execute the Workflow. This affects when the Workflow is executed and the time-related built-in parameters. If the Workflow with US/Eastern time zone is scheduled to run at each day at 5 AM from 6/1/2018 to 6/2/2018, then it will run on 6/1/2018 and 6/2/2018 at 5 AM US/Eastern time. The following built-in parameters will reflect the date and time in US/Eastern time zone during the execution: var_date, var_daydate, var_year, var_month, var_day, var_hour, var_yesterday, var_timezone. |
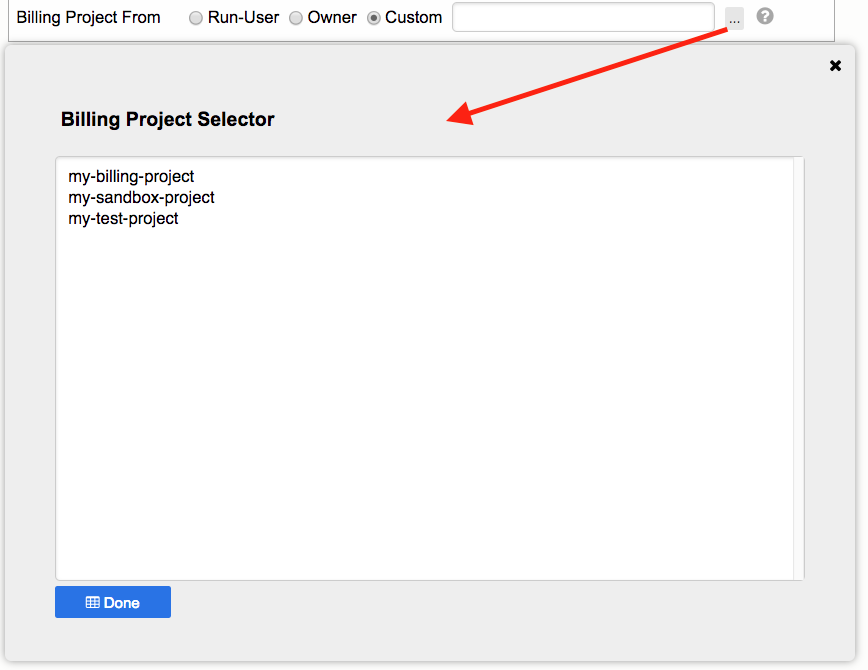
| Billing Project From |
By Default - user running workflow is billed to user's respective billing project any time workflow is run (manually or remotely)
Billing Project can be set to be a billing project of the workflow's owner - no matter who runs workflow
Finally, user can choose which project to bill that is not assigned by default to this user in Magnus
or picked from selection list (all projects where user has job execute permission are presented here)
|
| Enabled |
Enable/Disable workflow's schedule |
| Public |
Checked - the workflow is viewable by all users in owner's billing project |
| Save | Save new or modified Workflow |
| Exit | Exit workflow. Prompts to save if there are unsaved changes |
| Run | Runs workflow. Automatically saves if there are unsaved changes
Workflow will run under Owner Account when scheduled |
c. Click Save button
Save buttons can be found both at the upper right and lower left of the workflow or in toolbar on the left
Add New Task
a. Click button with Task you want to add to Workflow
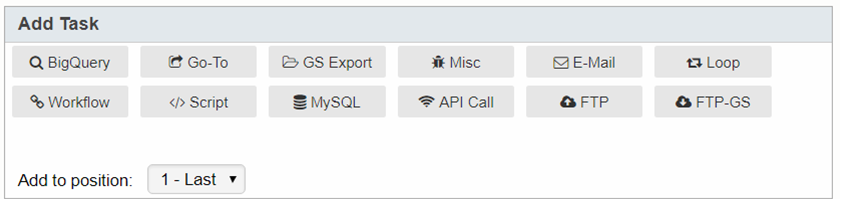
BigQuery Task – Executes BigQuery Query
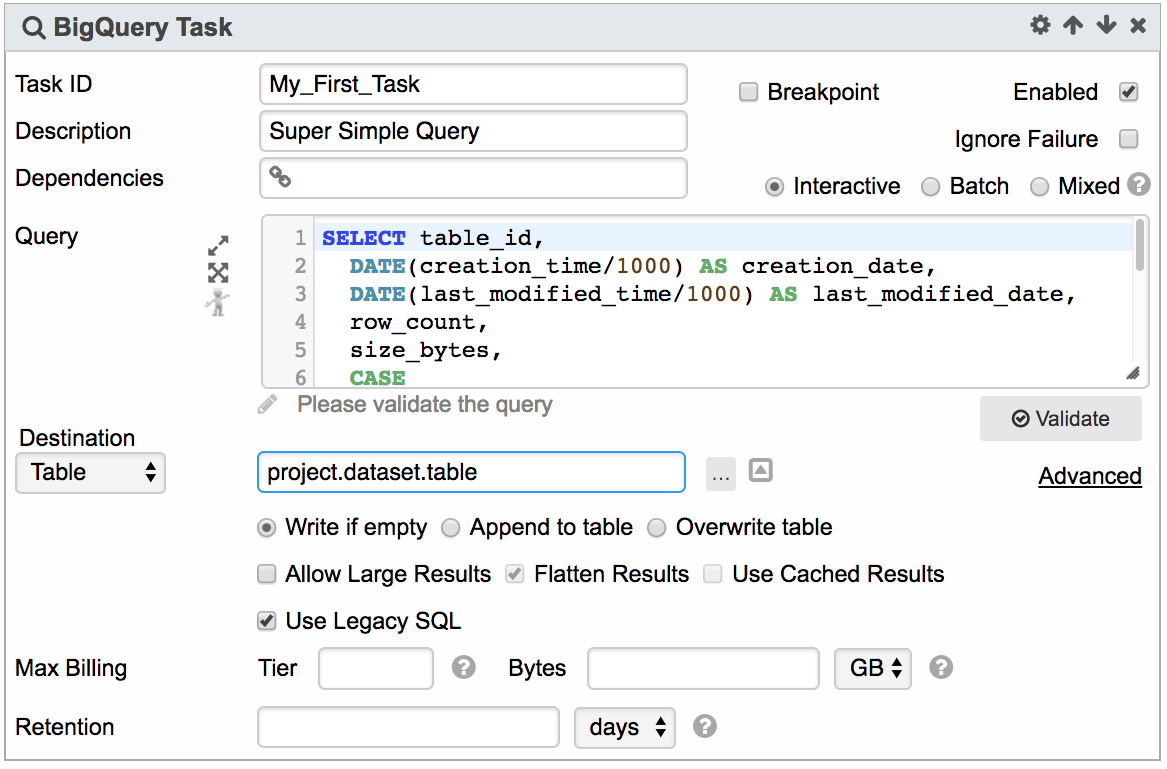
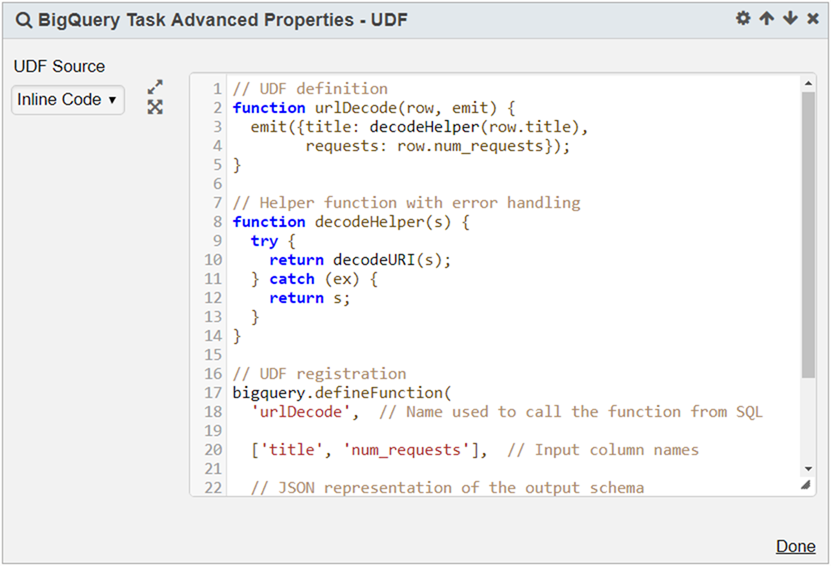
If BigQuery Legacy SQL is used - Advanced panel provides ability to set UDF Source:
either as JavaScript code in Google Cloud Storage

or as Inline Code
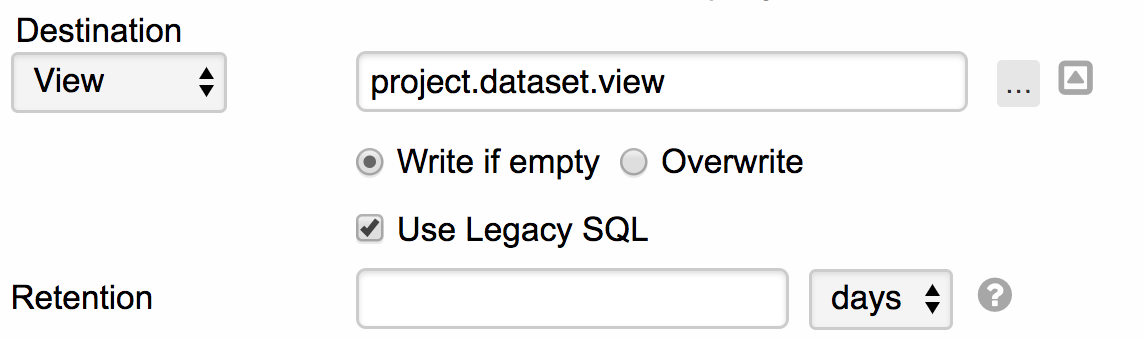
View as Destination
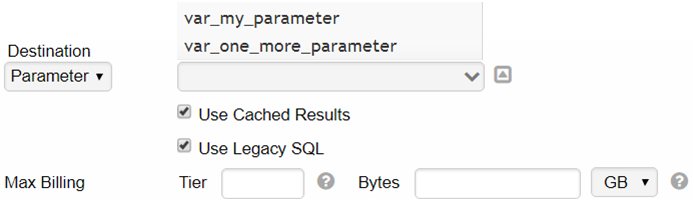
Parameter as Destination
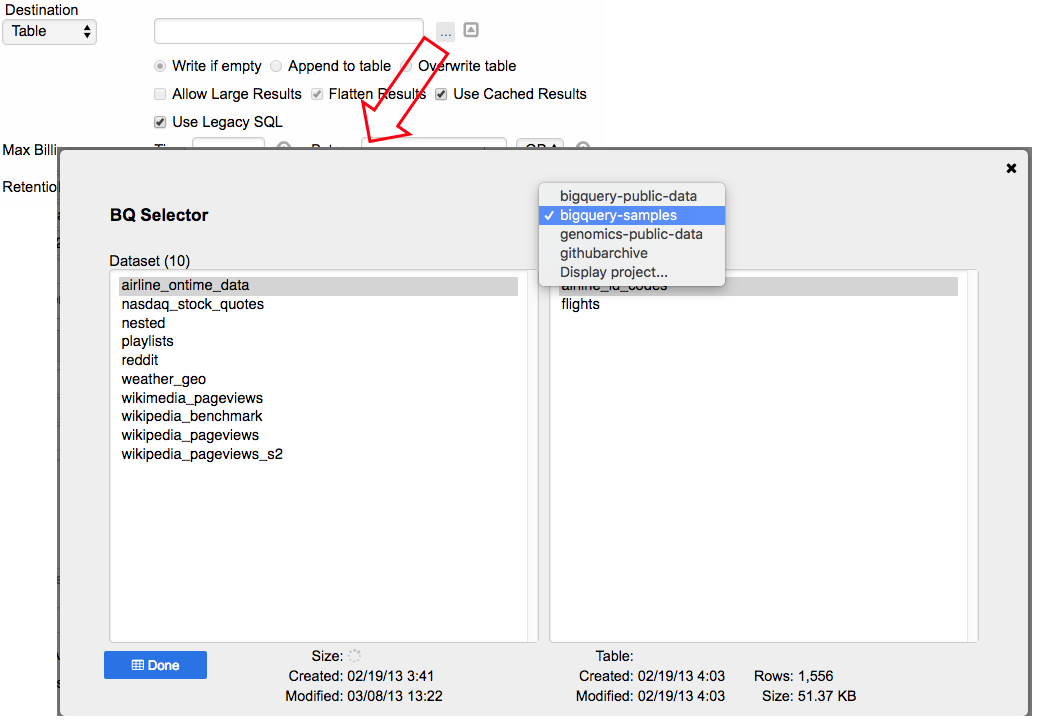
Datasets / Tables / Views Browsing
Destination Table or View can be entered manually or can be picked from BQ Selector
Parameters in Query and Destination and other entry fields
- Static and Dynamic
- Built-In and Custom
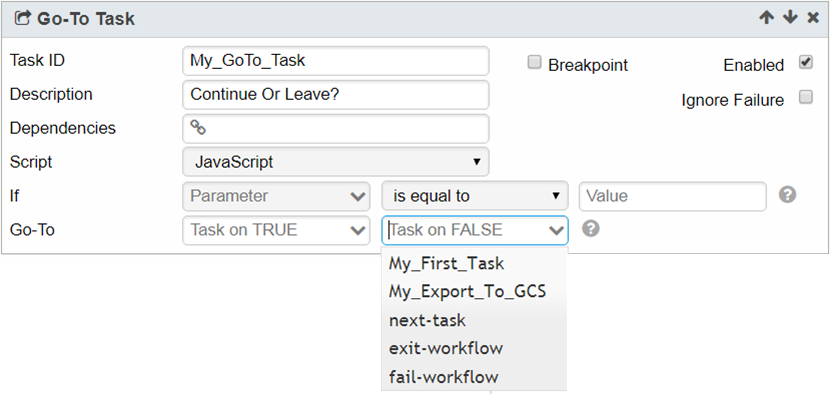
Go-To Task – Decision making based on some condition
Which next task to execute or leave Workflow (with or without failure)
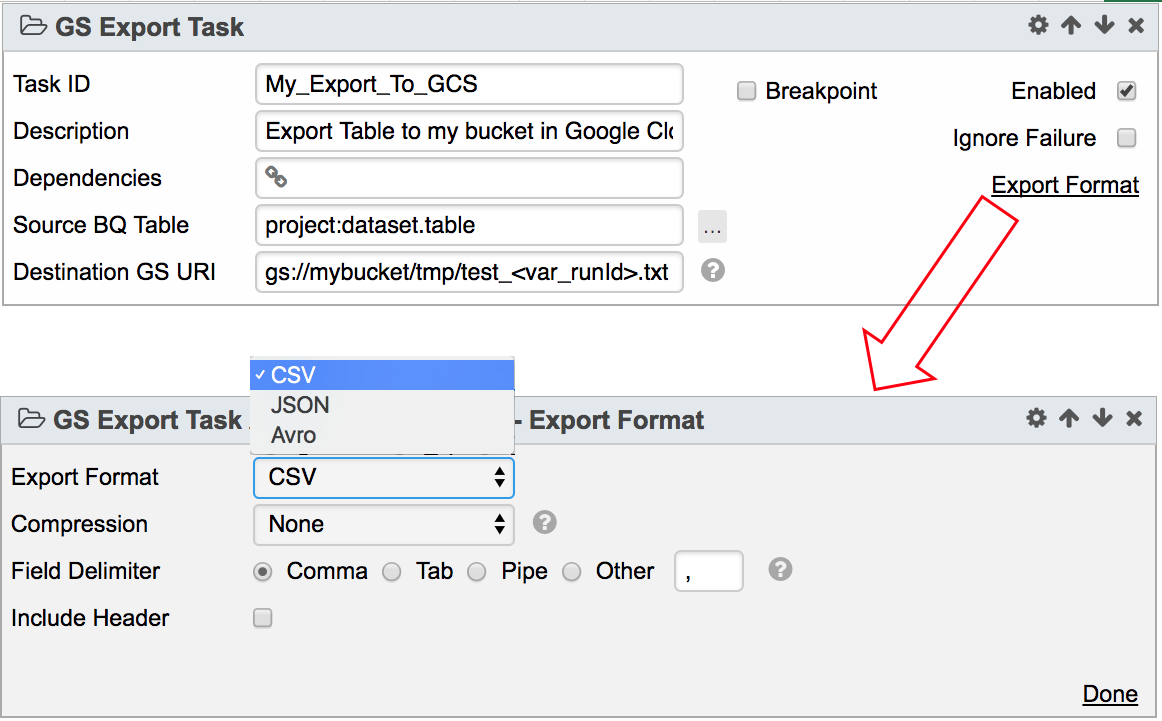
GS Export Task – Export GBQ Table to Google Cloud Storage
b. Common Tasks' Fields/Elements 
| Task ID | Unique (within given Workflow) Task identifier |
| Description | Free text describing Task |
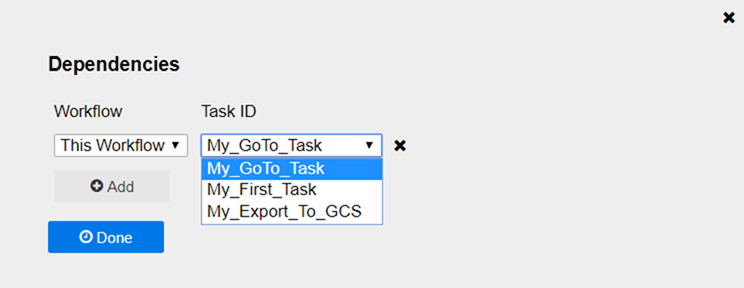
| Dependencies |
For future releases, but even now can be used to visually track Tasks dependencies For some Tasks selecting Dependency pre-populates respective entries with Output Parameter of dependency Task , for example:
|
| Enabled | Check box - Enable/Disable Task within Workflow for All (Scheduled, Manual or Remote) Run |
|
Icons |
Respectively: Flip Side (Advanced Options, Formats, etc.) Move Task Up and Down - Note: Tasks executed in order from top to bottom Delete Task |
| Ignore Failure |
If not checked - when Task fails - whole workflow fails If checked - when Task failed - workflow does not fail and flow jumps to next Task. |
| Breakpoint | If there are any Task(s) with checked on Breakpoint - behavior of workflow failure is changed and flow jumps to the first such task after point of workflow failure This feature can be used to mimic try-catch, or finalize or sort of web-hooks, etc |

c. Parameters:
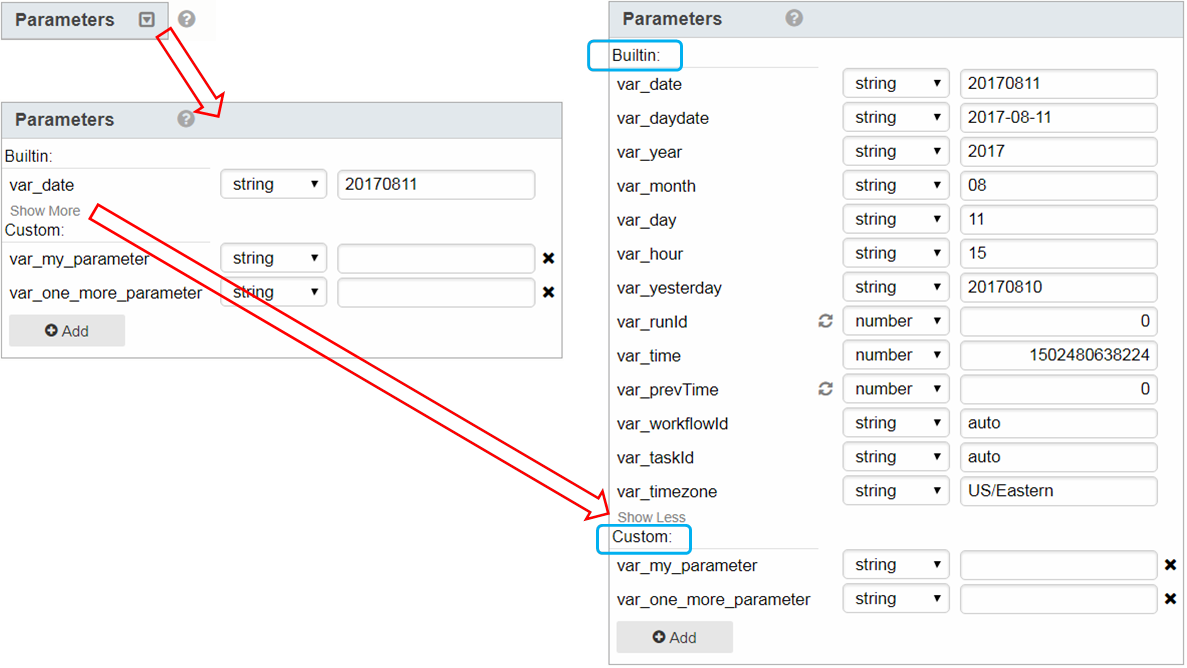
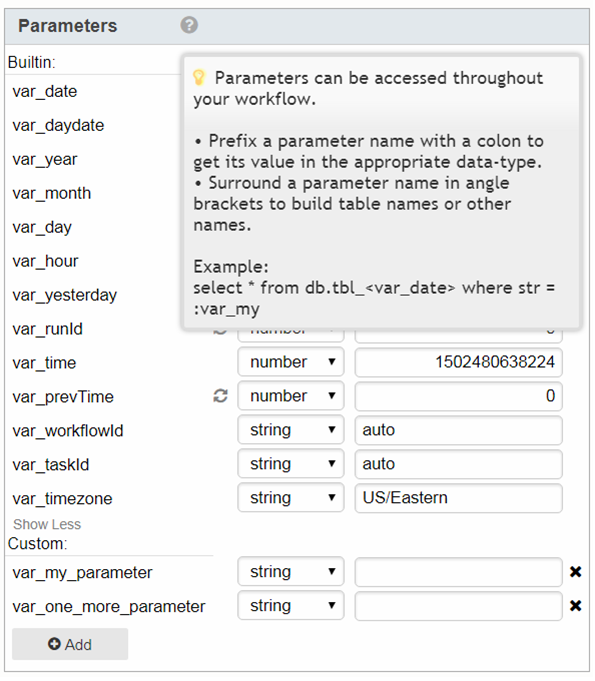
Built-In Parameters
Allows using pre-built parameters in user's Workflow/Tasks
They are mostly self explanatory
| var_runid | auto increment; counts workflow executions |
| var_time and var_prevTime | hold respectively execution start and previous execution start time |
| var_timezone | Basis for Date/Time related Parameters set in Run-Time |
Design Time values are used for Tasks validations Parameters with reset icon can be reset to 0 or empty string
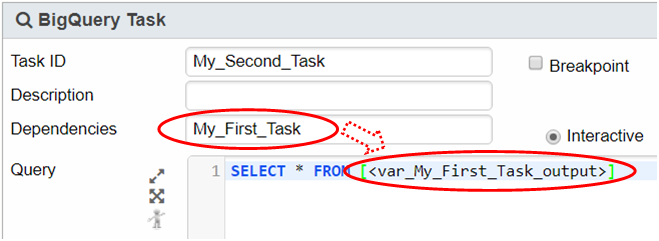
Task Output Parameters
Task output is a built-In parameter that does not appear in built-in parameters list
Whenever a new task is created – there is a linked parameter available: var_<TaskID>_output
For example a task ID of getTableNames would have a task output parameter of var_getTableNames_output
The output generated by the task can be referenced in other tasks.
For example a new BQTask can reference the output of getTableNames by adding SELECT * FROM [<var_My_First_Task_output>] to the query area
This is an alternative to referencing the destination table of the getTableNames task
Custom Parameters
Allows setting and using user's custom parameters to support logic implementation
Click Add button in below Panel
Enter Parameter Name in Pop-up; "var_" will be added if name you entered is not started with it
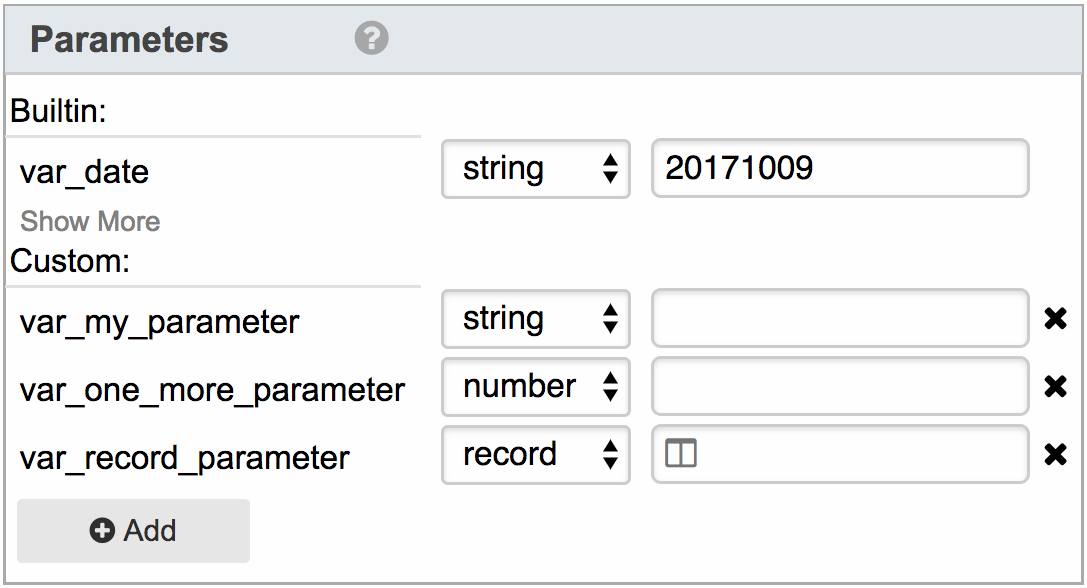
BigQuery data types are available to set parameter's type to support typed substitution. They include
- String
- Number
- Boolean
- Record
Note: Timeslice data type used to be supported in conjunction with Time Slice Tasks which is retired now
Parameters Usage
Prefix parameter name (ie :var_parameterName) with colon to get its typed value
Surround parameter name in angle brackets (ie <var_parameterName >) for text substitution for building source or destination names and dynamic SQL
Browse Workflows
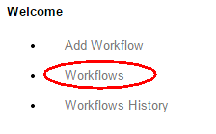
a. Click Workflows Menu Item
b. Browse / Sort / Filter / etc. available workflows

User can switch between Owned, Delegated, Shared and Public Workflows. Get Started Examples are also available as a separate group User can View, Edit, Explore, Archive or Browse Execution history of selected Workflow using respective icons
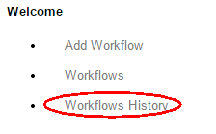
b. Browse / Sort / Filter / etc. available execution history (last 7 days /last 1000 entries)
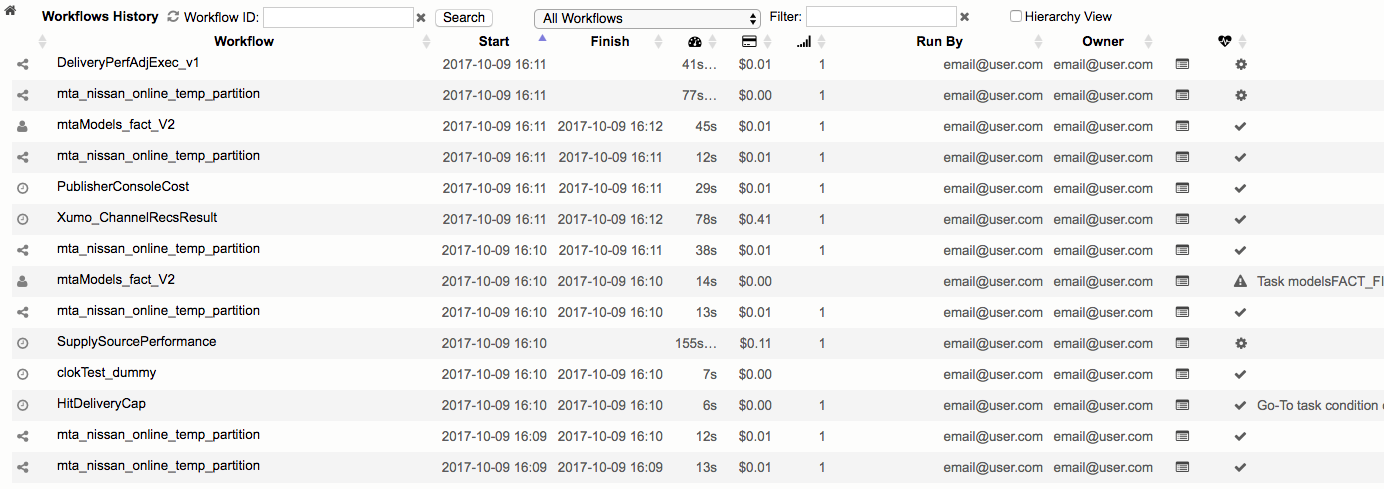


 indicate respectively - Scheduled Run, Manual Run, Run via Execute Workflow Task (as shared workflow), Run via Execute Workflow Task, Run as Trigger, Remote Run via Queue
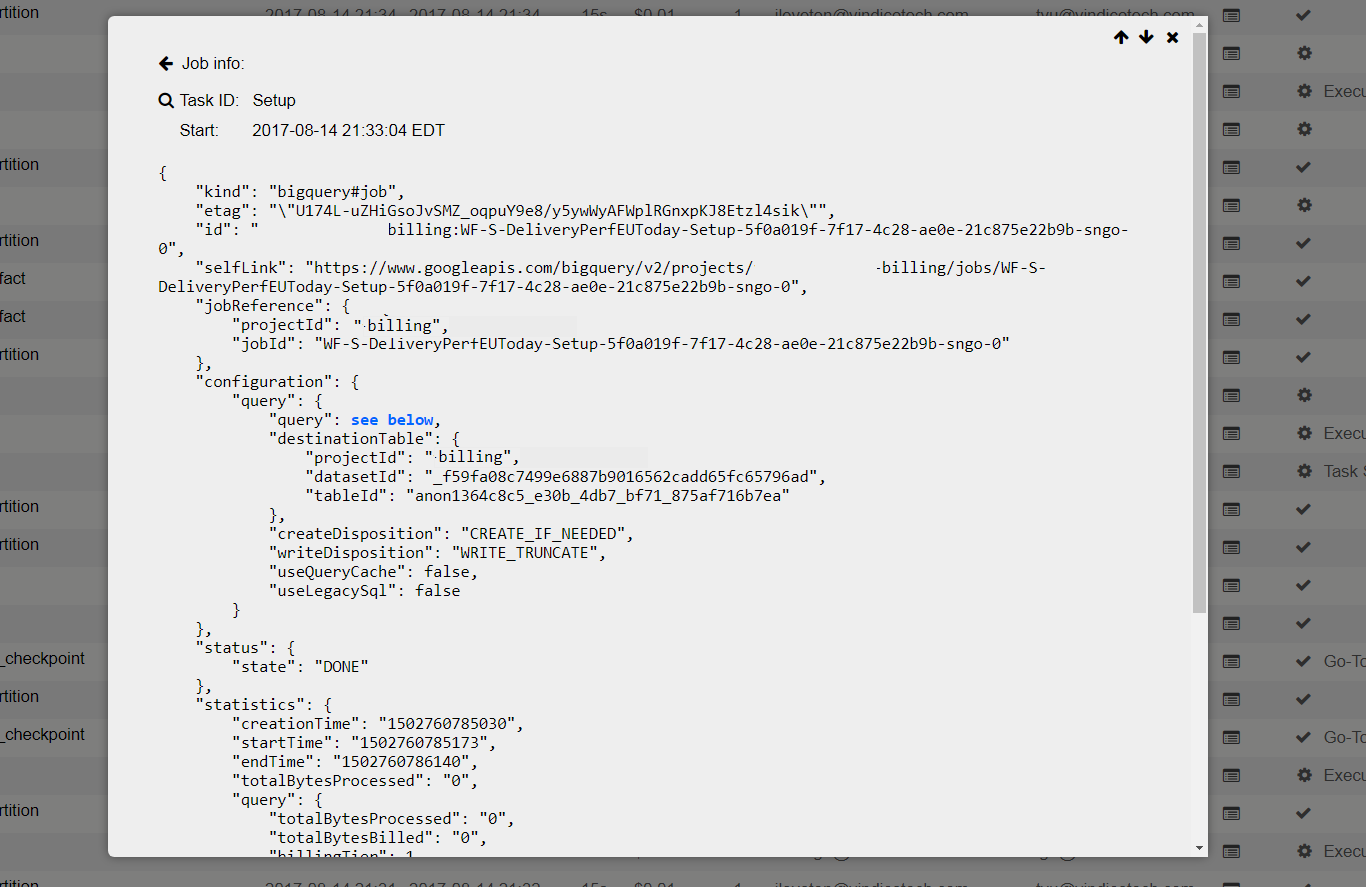
c. Details for selected history item is available by clicking on Details Icon

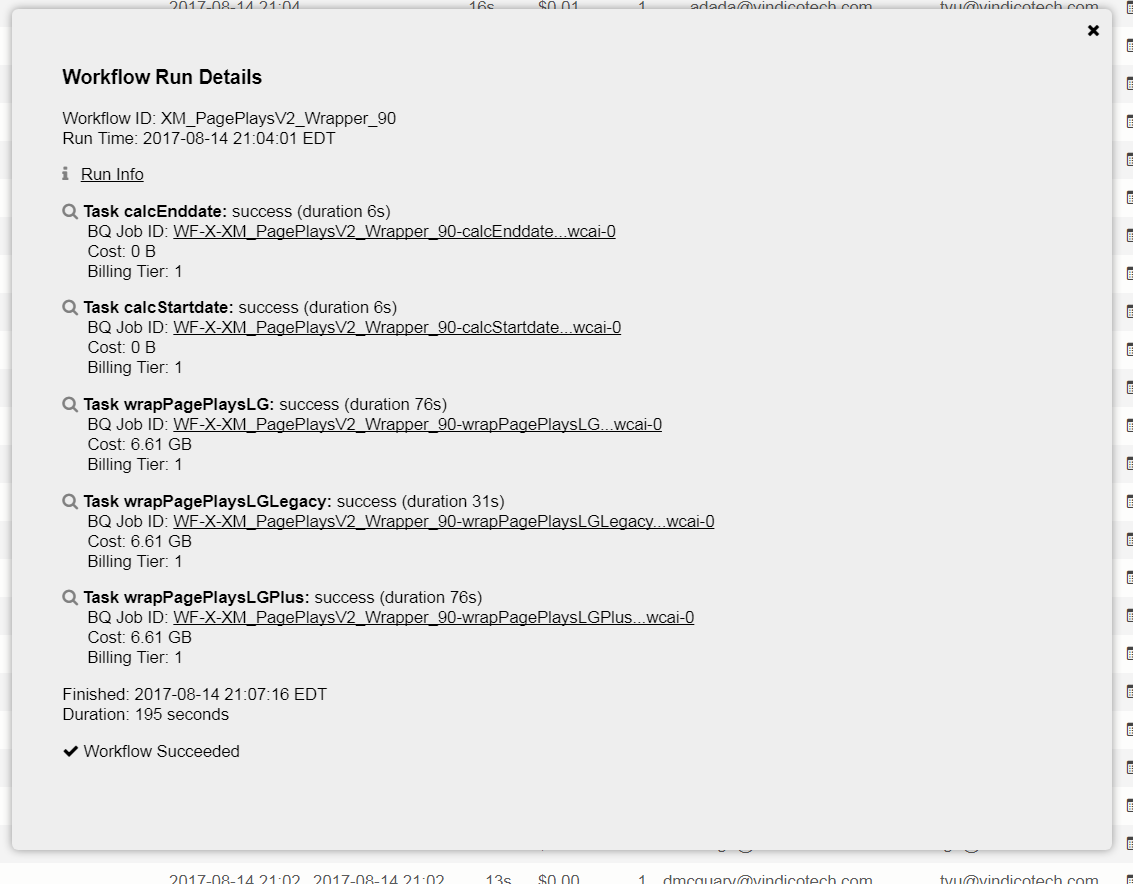
d. Task Level Details are available under respective Links in Workflow Run Pop-up