This quickstart shows you how to parameterize your query by using custom parameters.
You will query data from BigQuery for a specified date range using custom parameters, so that you don't have to hardcode the date in the query or other places. When you want to query data for a different date range, you just need to change that in the custom parameters.
Objectives
- Validate input parameter values.
- Find the top 50 presidential candidates who received the most individual donations for a specified year and month.
- Save the results to a BigQuery table named <tableName>_YYYYMM, where YYYY is the reporting year and MM is the reporting month.
- Export the resulting BigQuery table to a Google Cloud Storage file named <filename>_YYYYMM, where YYYY is the reporting year and MM is the reporting month.
Copying the sample Workflow
- Open the sample Workflow: quickstart_002
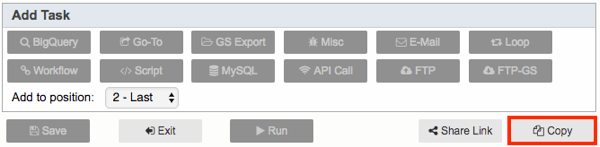
- Click on the Copy button at the bottom of the page.
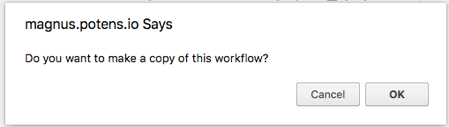
- Click OK when prompted "Do you want to make a copy this workflow?".
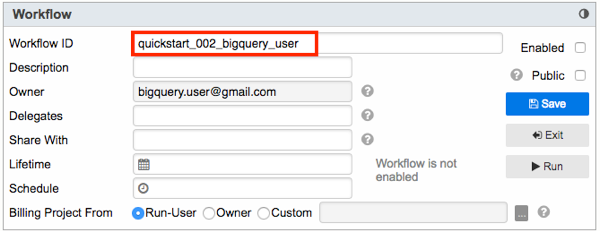
- Specify the Workflow ID.
Workflow ID is global and must be unique. The Workflow ID, which must start with a letter, can contain only letters, numbers, and underscores. One way to make your Workflow ID unique is to incorporate your email address into the ID. For example, if your email address is bigquery.user@gmail.com:
- Provide values for the custom parameters.
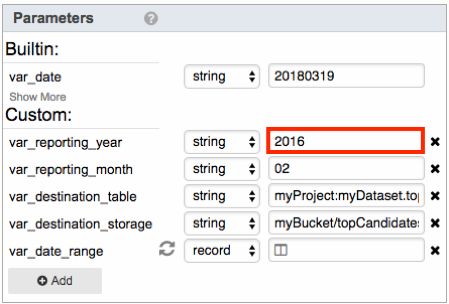
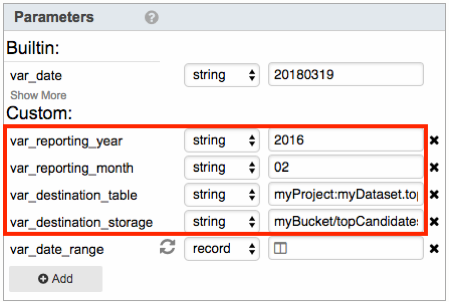
- Click on the Parameters panel to see the list of custom parameters.
- var_reporting_year: Specify the year to get donations data from. Enter 2016 in the text box since data is only available for that year.
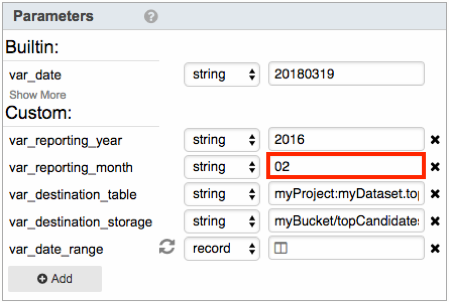
- var_reporting_month: Specify the month to get donations data from. Enter any 2-digit number from 01 to 12. For example, to get data for February, enter 02:
- var_destination_table: Specify the name of the destination BigQuery table to store the results. You must have permission to edit the specified dataset. The format is <project>:<dataset>.<table>.
For example, if you enter myProject:myDataset.topCandidates, the results will be stored in a BigQuery table named myProject:myDataset.topCandidates_201602.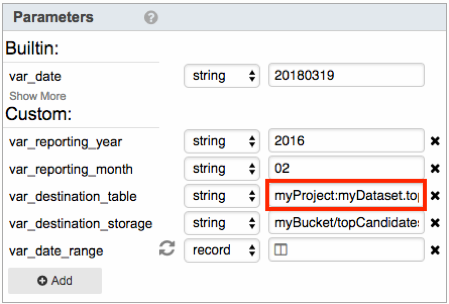
- var_destination_storage: Specify the destination Cloud Storage location to export the table to. You must have permission to create objects in the specified bucket. The format is <bucket>/<file>.
For example, if you enter myBucket/topCandidates, the table will be exported to the Cloud Storage file gs://myBucket/topCandidates_201602.csv.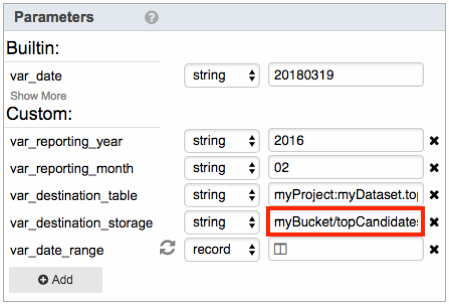
- Click on the Parameters panel to see the list of custom parameters.
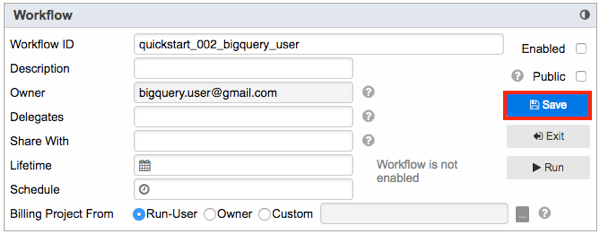
- Click Save to save the Workflow.
Running the Workflow
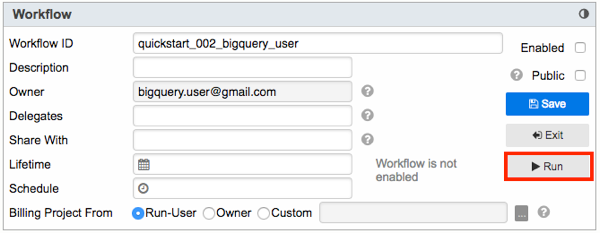
- Click on the Run button to run the Workflow.
- Upon completion, you will see the results in the destination BigQuery table. Following the example here, the table will be myProject:myDataset.topCandidates_201602.
You can preview the table data from BigQuery console UI.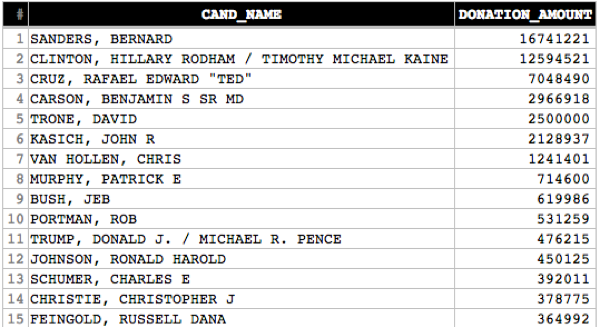
You will also see the exported results in Cloud Storage. Following the example here, the file will be gs://myBucket/topCandidates_201602.csv.
You can view the file from Google Cloud Storage console UI.
Clean up
You can delete the destination table and cloud storage file you just created from the Workflow execution.
What’s next
- Check out quickstart 3 to learn how to iteratively execute the Workflow you just created to generate monthly results for a list of months.
Workflow explained
- This Workflow demonstrates four core features: Custom Parameters, Go-To Task, BigQuery Task, and GS-Export Task.
- Four custom parameters serve as input to this Workflow and make the Workflow dynamic. They are:
They specify what date range to query donations data from and the destination BigQuery table and Cloud Storage to save the results. In this example, donations data from February 2016 are queried and saved to the BigQuery table myProject:myDataset.topCandidates_201602. The BigQuery table is then exported to the Cloud Storage file gs://myBucket/topCandidates_201602.csv. - Whenever input parameters are expected of a Workflow, it is good practice to validate the parameter values. One way to do so is using the Go-To Task. Go-To task is used here for the sake for demonstrations here. In real life, there are better ways to do this. The first Go-To Task named validate_reporting_year validates the input value var_reporting_year, making sure that it contains 4 digits. If validation does not pass, the Workflow fails and execution halts.
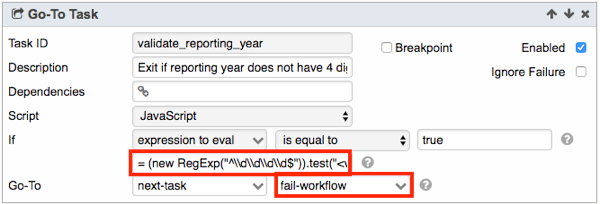
- Similarly, the second Go-To Task named validate_reporting_month validates the input value var_reporting_month, making sure that it contains 2 digits from 01 to 12. If validation does not pass, the Workflow fails and execution halts.

- Next, the BigQuery Task named get_report_start_end_date calculates the start and end dates of the reporting month in the format of YYYYMMDD, using the input parameters. So, for February 2016, the start and end dates are 20160201 and 20160129 respectively.
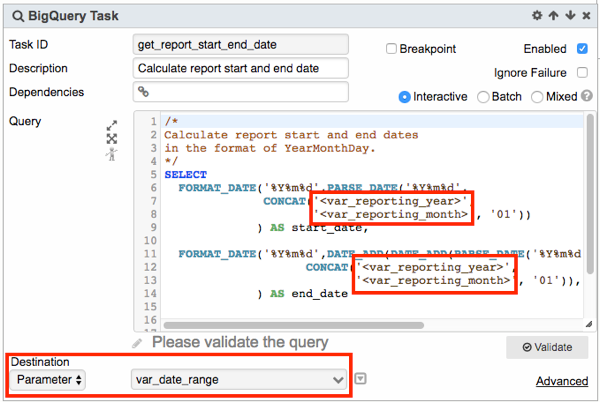
Note that the Destination Type is a custom parameter of record type. This allows us to store multiple values in one parameter. In this case, it allows us to store both the start date and end date in one parameter, namely var_date_range.
Custom parameter is created and managed by user in the Parameters panel.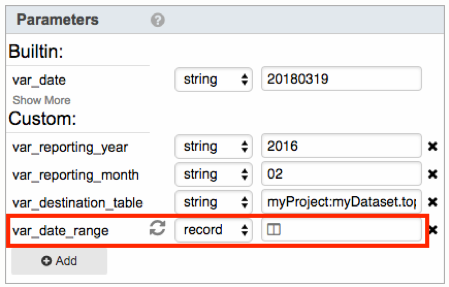
To access the two fields with the record parameter, simply refer to them by either field name: <var_date_range[start_date]>, <var_date_range[end_date]>, or by ordinal: <var_date_range[1]>, <var_date_range[2]>.
- Next, a BigQuery Task queries the candidates and contributions BigQuery tables for the specified transaction date range.
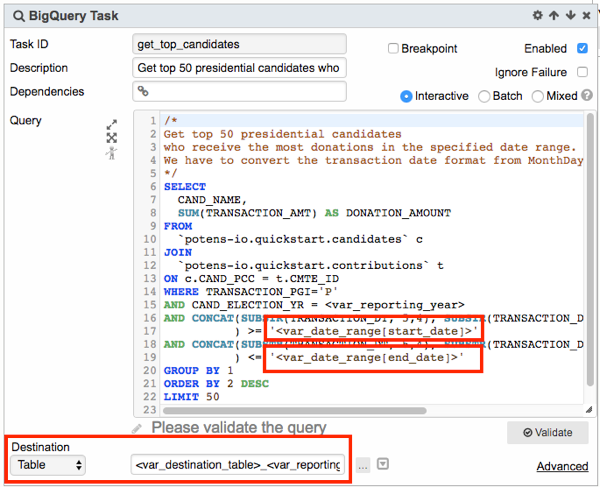
The Destination Type is Table, with table name specified as <var_destination_table>_<var_reporting_year><var_reporting_month>:
Following the example here, the results will be saved to the destination table myProject:myDataset.topCandidates_201602.
- Lastly, a GS-Export Task exports the resulting BigQuery table to a Cloud Storage file.
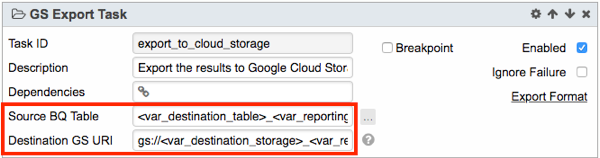
The Source BQ Table to be exported is exactly the BigQuery table created from the previous Task, namely <var_destination_table>_<var_reporting_year><var_reporting_month>
The Destination GS URI: gs://<var_destination_storage>_<var_reporting_year><var_reporting_month>.csv, specifies where to export the table to.
Following the example here, the table will be exported to the Cloud Storage file gs://myBucket/topCandidates_201602.csv.
View Completed Workflow
A completed version of the workflow in this quickstart can be found at https://magnus.potens.io/?l=cXVpY2tzdGFydF8wMDI=