Introduction
In the previous tutorial, Email Task, you learned how to send data results via email. Data results were enriched to send as a table in email and as an attachment. Email Task can also attach data from Google Cloud Storage (GCS). This tutorial will walk you through exporting data to GCS by introducing Cloud Storage Export Task.
Scenario
In our examples we saved data to a table and sent via email. What if we want to export the data to GCS?
By the end of the tutorial you will know
- How to access GCS
- How to export data to GCS
- The various GCS export options
- Send a GCS file as an email attachment
Steps
Google Cloud Storage allows you to store objects such as files in Google’s Cloud Platform. GCS consists of buckets, with structures similar to folders, that serve as containers where the data is stored. To continue with this tutorial, you will need to create a bucket that will be used in the Cloud Storage Export Task. To create a bucket, open the cloud storage browser from the Google Management console https://console.cloud.google.com/storage/browser and click on Create Bucket, so we will use it shortly.
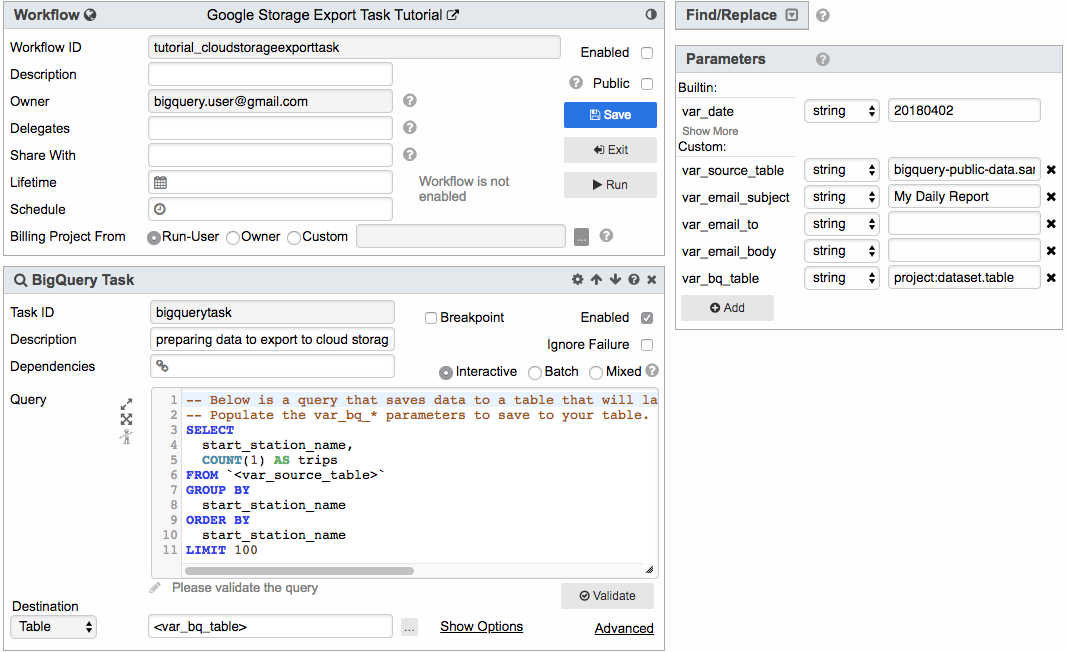
Create a workflow and add a BigQuery Task that will prepare data to export to the GCS bucket. A sample query is below. Add custom parameters for var_source_table with value bigquery-public-data.san_francisco.bikeshare_trips and var_bq_table with value of the full path to a destination table in your project.
SELECT
    start_station_name,
    COUNT(1) AS trips
FROM
    `<var_source_table>`
GROUP BY
    start_station_name
ORDER BY
    start_station_name
LIMIT 100
Set destination table to custom parameter <var_bq_table>
Add GS Export Task to workflow. The GS Export Task is used to export files to GCS. Name the task. In Source BQ Table add the custom parameter var_bq_table. This is the table created in the previous task and will be used as the source being exported to GCS. Create a custom parameter for var_gs_bucket. Set the value to the name of GCS bucket you created above. Add custom parameter var_gs_file_name. Set the value to the name of the file. For example gcs_tutorial_file.csv.

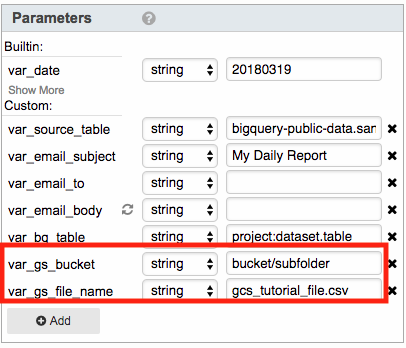

The full url for GCS is in the format of gs://[bucket]/[filename]. In the Destination GS URI field construct the url by including the custom parameters we created so that the result looks like gs://<var_gs_bucket>/<var_gs_file_name>.
Click on Export Format link. This will switch the panel to Advanced Properties. In Advanced Properties we can set options for the exported file. Leave all the default options but take note of what is available, so you can take advantage of them for future use. Click the Done link to switch back to the GS Export panel.
With GS Export Task we set the source BQ table to export into GCS and specified the bucket in GCS by setting destination. We can now expand the E-Mail Task to send the file in GCS as an attachment.
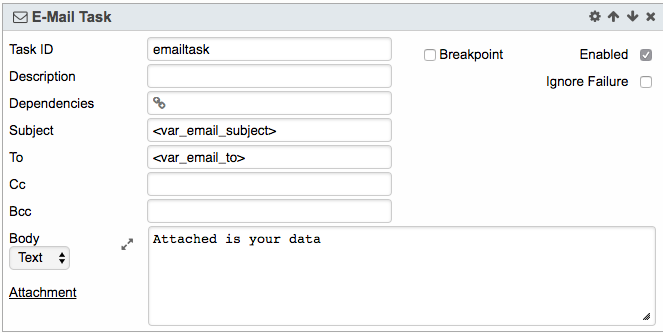
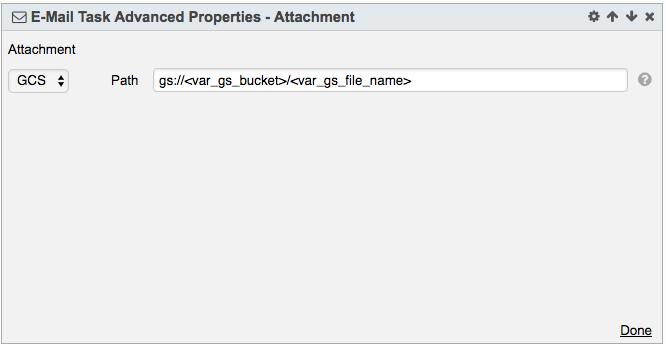
Add E-Mail Task. Provide a name for the task. Set values for Subject and To or create and assign custom parameters to these fields. In body type a message such as Attached is your data. Click on Attachment link to switch to Advanced Properties. In Attachment drop down select GCS. In path enter the path we constructed for the Destination URI in the GS Export Task. Click Done.
Save and run workflow.
Review
The workflow will run the query and save results to the destination table. The data in this table will then be exported to GCS bucket in CSV format. An email will then be sent with contents of that file attached. This example was used to introduce you to GS Export. You can expand on any of these steps and modify them to meet your needs.
Additional Information
GC Export Task https://potensio.zendesk.com/hc/en-us/articles/115003471191-Cloud-Storage-Export-Task
E-Mail Task https://potensio.zendesk.com/hc/en-us/articles/115003495472-Email-Task
Parameters https://potensio.zendesk.com/hc/en-us/articles/115003529371-Parameters
BigQuery Task https://potensio.zendesk.com/hc/en-us/articles/115003471031-BigQuery-Task
View completed workflow
A completed version of the workflow in this tutorial can be found at
https://magnus.potens.io/?l=dHV0b3JpYWxfY2xvdWRzdG9yYWdlZXhwb3J0dGFzaw==
What's Next?
Next, we will loop through data with Loop Task