Introduction
The following tutorial uses Google BigQuery public datasets. Visit https://cloud.google.com/bigquery/public-data/ to read more about public datasets and to learn how to use them with BigQuery by selecting a project and enabling billing.
You can use Magnus to create workflows that consists of a variety of tasks to accomplish your goals. This tutorial will walk you through creating a workflow to query data from a public dataset and saving the query result to a table.
By the end of the tutorial you will know
- How to add a workflow
- How to add a task to a workflow
- How to use the BigQuery Task
- How to validate a BigQuery Task query
- How to set a destination table for BigQuery Task
- How to set write options for destination table
- How to save a workflow
- How to manually run a workflow
Scenario
This tutorial will query a public dataset and save the result of the query to a table. Feel free to replace the example query with your own query.
Steps
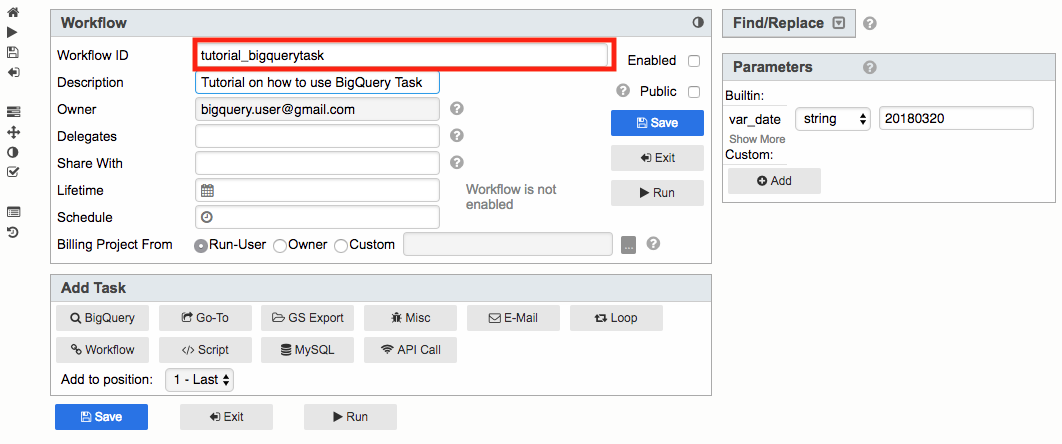
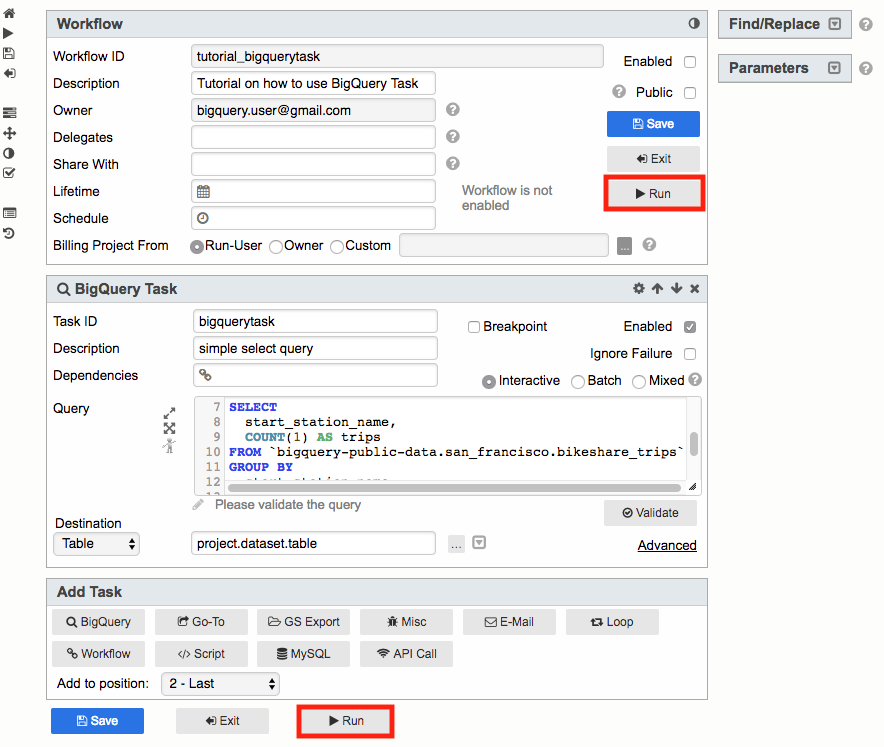
The Magnus Welcome page https://magnus.potens.io/ displays the main menu. Click Add Workflow to start creating a workflow. On the Workflow page provide a name for Workflow ID.
Note: Workflow ID must be unique so you might want to come up with your own id

Workflows consists of tasks. When a workflow is run these tasks are executed. By combining tasks together, you can automate your work. In Add Task section you will see a list of available tasks that can be added to a workflow.
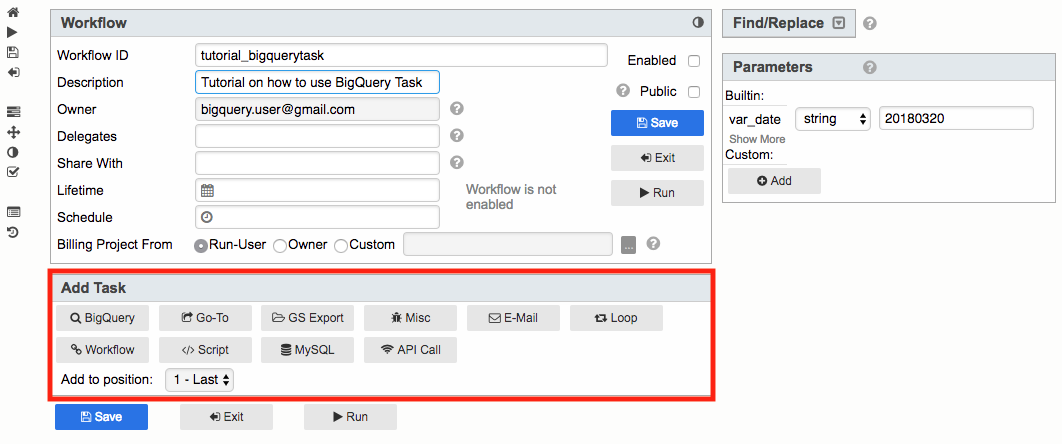
Among this list is BigQuery Task. BigQuery task is a task that enables you to add a query to the workflow that when run will execute the query in Google BigQuery. To add BigQuery Task to the workflow click on the BigQuery button from the Add Task section.

A BigQuery Task will appear under the Workflow header. Provide a name for the task in the Task ID field. Tasks within the Workflow must each have a unique name.

Any query that you use in Goliath or BigQuery Web UI can be used in BigQuery task. Below is an example of a query that uses bigquery-public-dataset. This is a simple query that counts the number of San Francisco Bike Share trips by station. Copy this query into the Query section of the BigQuery Task.
SELECT
    start_station_name,
    COUNT(1) AS trips
FROM `bigquery-public-data.san_francisco.bikeshare_trips`
GROUP BY
    start_station_name
ORDER BY
start_station_name 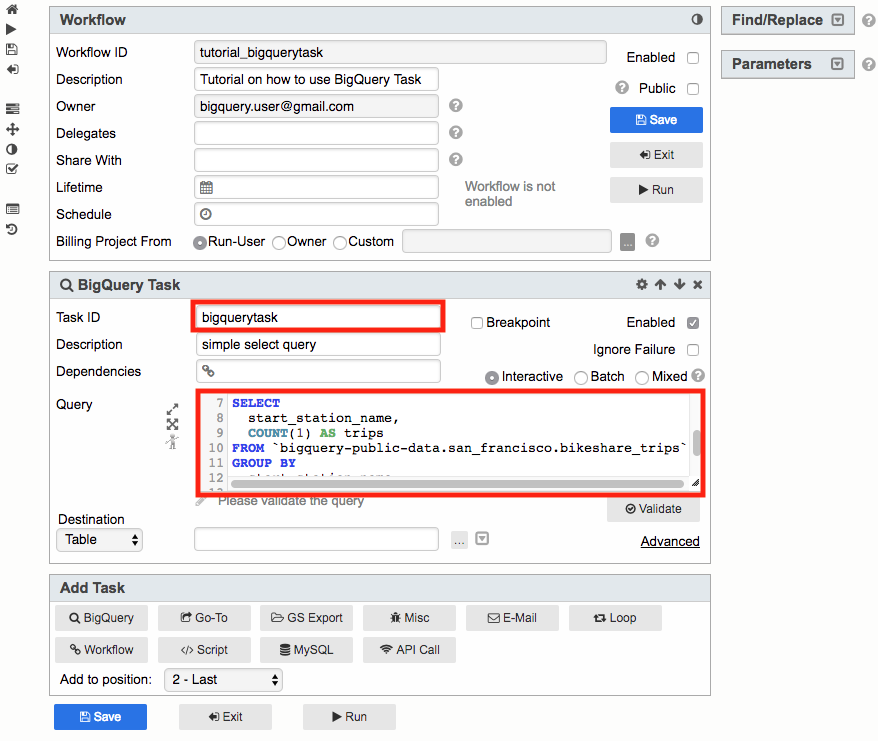
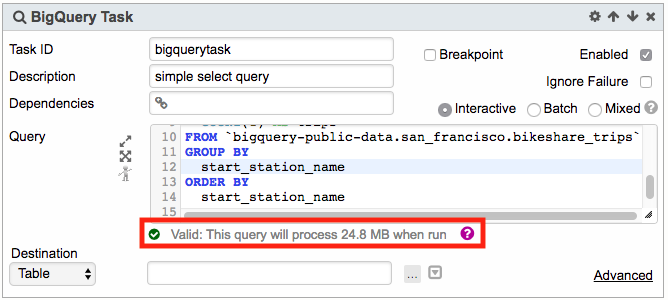
As mentioned you can copy any query into BigQuery task. It is good practice to create and test your query in Goliath or Google BigQuery console beforehand to ensure that there are no errors. An additional check can be made to the query by validating it within the BigQuery Task. After the query is finalized click on the Validate button to test it. Clicking on the Validate button will send the query to BigQuery service for validation. If the query is valid you will be provided with an approximate size of the query that will be processed. If the query is invalid an error message describing the issue will be displayed. Use feedback from the error message to correct any issues with the query and repeat validation until the query is valid.

When the workflow is run the BigQuery Task will execute the query. We need to handle the results of this query. For this tutorial you will save the results to a table. Before you can save the results to table you need to create or have an existing dataset in your project. To create a dataset, you can use Goliath (right click project header and select Create Dataset) or BigQuery Web UI (click down arrow icon and click Create new dataset).
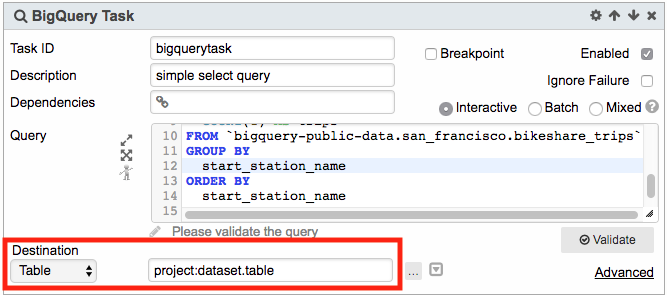
To save the query result of the BigQuery Task set Destination to Table by providing the name of the table in the destination field. The name of the table should include the full path of project:dataset.table.
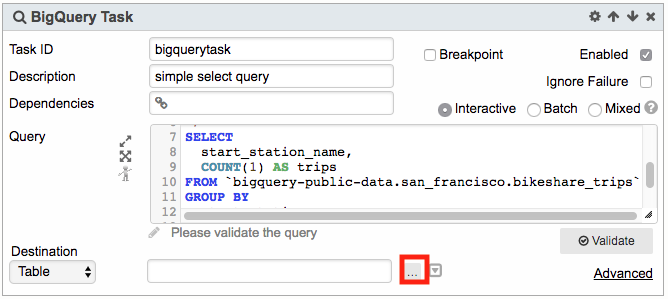
Alternatively, if the table already exists you can select it via Choose Table button. Choose Table brings up a BigQuery Selector that displays lists of projects, datasets, and tables. Pick the project from the drop down, dataset from the list on left side, and table from the list on right side.

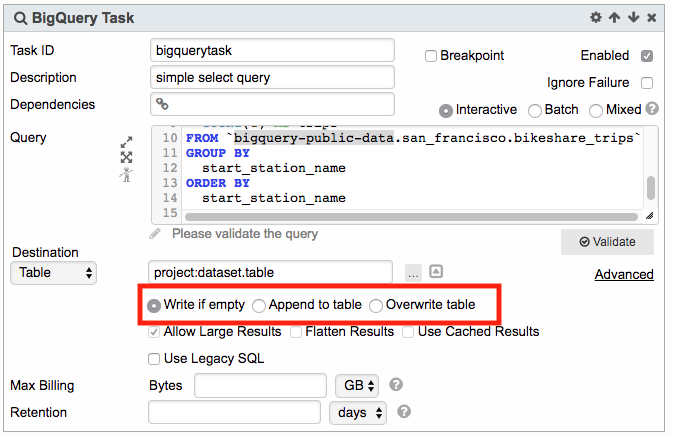
Clicking on the arrow to the right of Choose table… displays extra query options. These include Write if empty, Append to table, and Overwrite table. If the destination table already exists and Write if empty is selected than the query will fail. If you would like to save the data to an existing table either Append to table which will save the query results to the existing table or Overwrite table which will remove data from the existing table and replace it with query results.

Click on the Save button to save the workflow. The workflow will be evaluated for any potential errors. If there is no initial error then the workflow will be successfully saved. If there are any errors a message will display listing them. Resolve the errors and Save again.
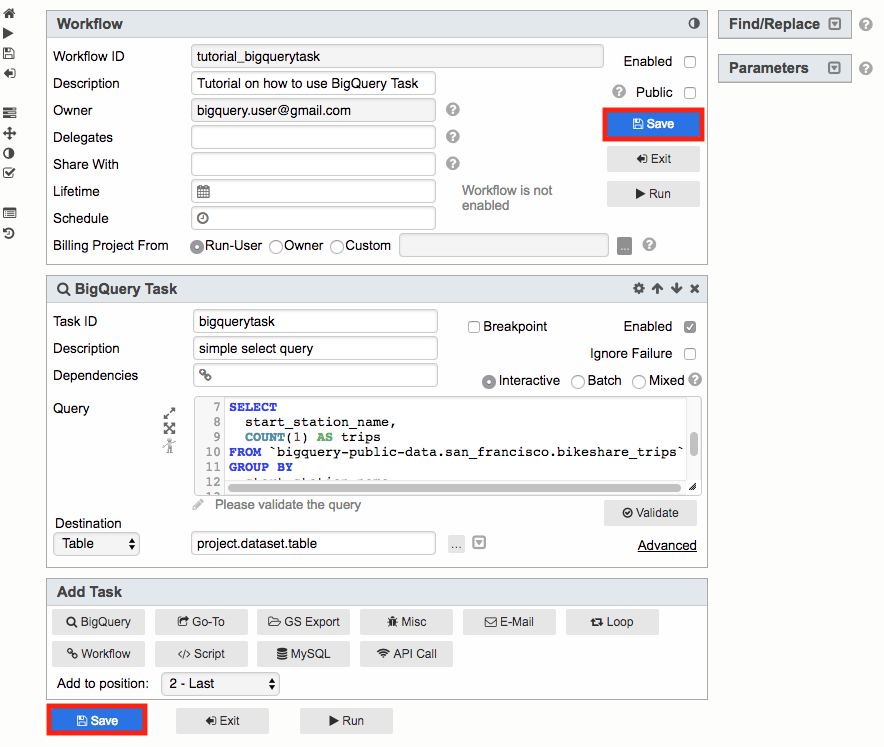
Click on Run to manually run the workflow. The workflow will execute and, in our example, submit the query to BigQuery and save the results in the destination table. While the workflow is running a message will displaying the status and the page will be greyed out. When the workflow is finished the message will disappear and the workflow will be displayed.
To view the result of the query, navigate to Goliath or BigQuery Web UI and preview or query the destination table provided above.
Review
This tutorial walked you through adding a workflow, adding a BigQuery Task to the workflow, and saving the results to a table.
Additional Documentation
Workflow: https://potensio.zendesk.com/hc/en-us/articles/115003494352-Workflow
BigQuery Task: https://potensio.zendesk.com/hc/en-us/articles/115003471031-BigQuery-Task
View Completed Workflow
A completed version of the workflow in this tutorial can be found at https://magnus.potens.io/?l=dHV0b3JpYWxfYmlncXVlcnl0YXNr
What's Next?
Next, we will use parameters to template the workflow